Creating an Aurora in Photoshop
Creating an Aurora in Photoshop
This tutorial goes through the steps to creating a beautiful skyline above a grassy field.
I'd recommend making this image 779 pixels wide, so it fits perfectly on a 800x600 screen.
1 – Vivid Clouds
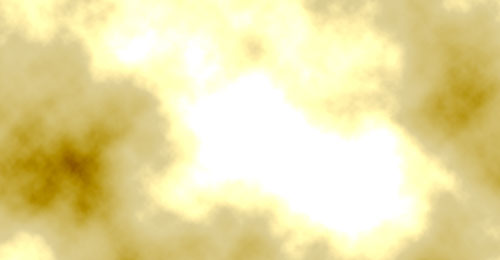
![]() Fill the area with a tan colour. I've used DDCE92 here.
Fill the area with a tan colour. I've used DDCE92 here.
![]() Create a new layer.
Create a new layer.
Press D to set the colours back to black and white.
Click Filter > Render > Clouds.
Change the layer's Mode from Normal to Vivid Light. This makes the clouds, well, "vivid" :)
Keep pressing Ctrl+F to redo the Clouds until you're happy.
2 – Brushing in a green area
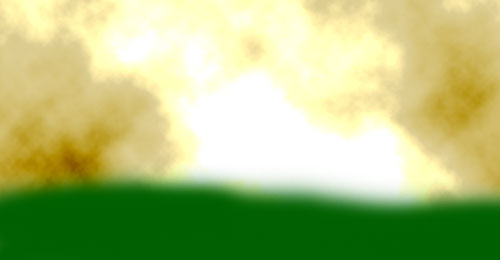
![]() Create a new layer.
Create a new layer.
Select a medium green colour (I've used #006000 here)
![]() Choose a fairly large, blurry brush from the drop-down list and brush in an uneven area at the bottom of your image.
Choose a fairly large, blurry brush from the drop-down list and brush in an uneven area at the bottom of your image.
3 – Adding grass and a title
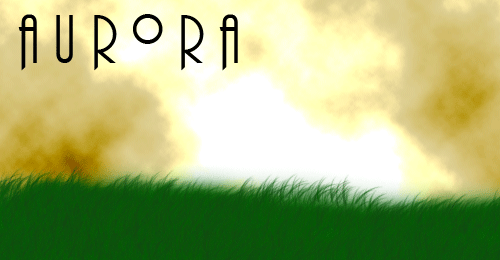
![]() Create a new layer.
Create a new layer.
Change your background colour to a slightly darker green than your foreground colour. (I've used #003200 here.)
![]() In the list of brushes at the top left of the screen, scroll down about two thirds of the way down, and choose Dune Grass. Look out for a brush at size 112, and you'll find it. Change its Master Diameter to 30, and start brushing in your grass. Try to stay roughly at the edge of the green area, though it's not a problem if the green shows through a bit.
In the list of brushes at the top left of the screen, scroll down about two thirds of the way down, and choose Dune Grass. Look out for a brush at size 112, and you'll find it. Change its Master Diameter to 30, and start brushing in your grass. Try to stay roughly at the edge of the green area, though it's not a problem if the green shows through a bit.
![]() Add in your own text. I've used the Plaza Swash font here. Resist the urge to give your text a bevel or shadow. You don't want to lessen the aurora effect with a big plastic-bevel header. :)
Add in your own text. I've used the Plaza Swash font here. Resist the urge to give your text a bevel or shadow. You don't want to lessen the aurora effect with a big plastic-bevel header. :)
Click File > Save for Web, and save the image as a gif. I usually use Jpeg, Quality 60, but in this case, a jpeg mashes the strands of grass together.
![]()
4 – Creating a sliver
![]() Select a big patch of grass, the whole width of your image.
Select a big patch of grass, the whole width of your image.
Click Image > Crop.
Save this image for the web, using the same settings as the last image.
![]()
5 – Creating a shader
A shader (in this case) is a very small image, that's partly transparent, and partly black. When it's tiled over another image, it effectively darkens that image.
Create a new image, two pixels wide, and two pixels high. Press Ctrl + several times to zoom in.
![]() Create a new layer.
Create a new layer.
![]() Use the Pencil Tool (may be hidden under the Brush Tool) to put in two black dots as shown.
Use the Pencil Tool (may be hidden under the Brush Tool) to put in two black dots as shown.
Delete the Background layer. This should reveal the grey and white checkerboard pattern underneath, which indicates that the area is transparent.
Save the image for the web, as a gif. Make sure the Transparency box is ticked.
![]()
6 – Making a divider
Create a new image, net quite as wide as your original.
![]() Create a new layer.
Create a new layer.
![]() Fill the area with an orangey-yellow. I've used #FFDE00 here.
Fill the area with an orangey-yellow. I've used #FFDE00 here.
Right-click the layer, in the Layers list, and choose Blending Options. Give the layer a Bevel. Change the Gloss Contour to Ring - Double.
Save this image for the web.
|
7 – Organising everything into a web page
In your web editor, set the background of your page to black, and insert a table of one cell.
Change the width of the table to the width of your main image. Set padding and spacing to 0, but give it a border of one pixel. Set the table's alignment to "Center", and set the sliver you made as its background.
Push enter a few times to make the table taller, and put your main image at the top of this table.
Below your header, put it another centred table. Set your shader image as its background, and put two copies of your gold divider in.
You can then put your own text in this area.
INGIN MENDAPATKAN INFO LANGSUNG KE EMAIL...? MASUKKAN EMAIL ANDA


Post a Comment
DONATUR SYARIAH CHEK HARE